Solar metal roof mounting system,SPC-RF-CK05-HR
installation steps
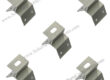
1.1 Clean the tin roof, and according to the site construction drawings,
Draw a line at the installation position of the tin roof clamp SPC-CK-05 as picture 1 shows.

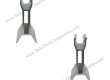
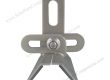
1.2 Put the trapezoidal clamp SPC-CK-05on the installation position of the tin roof, the rubber washer is attached to the side of the tin roof wave crest, as picture 2 shows.
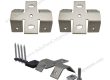
And fix the trapezoidal clamp with four self-tapping screw (ST6.3 * 25), as picture 3 shows.
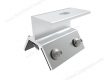
After installation ,as picture 4 shows.


1.3 According to step 2, fix all the remaining trapezoidal clamps SPC-CK-05 on the tin roof according to the drawings. After installation, as picture 5 shows.

1.4 Put the solar panel horizontally on the four SPC-CK-05 trapezoidal clamps, and the mounting holes on the clamps need to be exposed. Hold the solar panel by hand when installing to prevent the panel from sliding down. As picture 6 shows.

1.5 Remove the Carriage bolt on the end clamp. Pass under the SPC-CK-05 trapezoidal clamp mounting hole to expose the threaded part. As picture 7 shows.

1.6 Pass the end clamp, M8 spring washer, and nut through the exposed bolts in turn, and then use a sleeve to lock the nut on the end clamp, As picture 8shows.
After installation As picture 9 shows.


1.7 Remove the longer carriage bolts from the mid clamp components. Pass under the SPC-CK-05 trapezoidal clamp mounting hole to expose the threaded part, As picture 10 shows.

1.8 Pass the mid clamp, M8 spring washer, and nut through the exposed bolts in turn, and then use the sleeve to lock the nut on the mid clamp, as picture 11 shows.
After the installation is complete, as picture 12-13 shows.


1.9 According to the above steps, install the panels in sequence with the mid clamp, as picture 14 shows.

2.0 After the overall installation is complete as picture 15 shows.

More Good Quality Mounting Component Series can be reached at : www.SolarPartsComponents.com