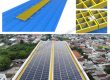

Galvanized Metal Fence for Solar Power
- Product Type: Solar Fence
- Product Model: Solar protect fence
- Material: QB235
- Max Wind Load : 60 m/s
- Max Snow Load : 1.4 KN / M 2
- Solar Module Orientation: Landscape / Horizontal
- Application: Solar mounting
Product Description:
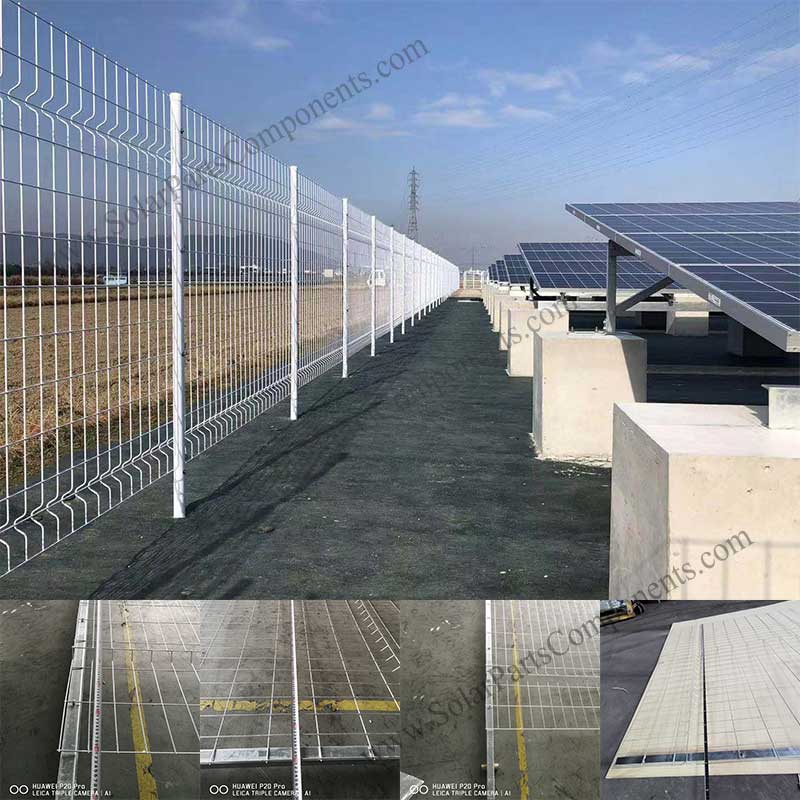
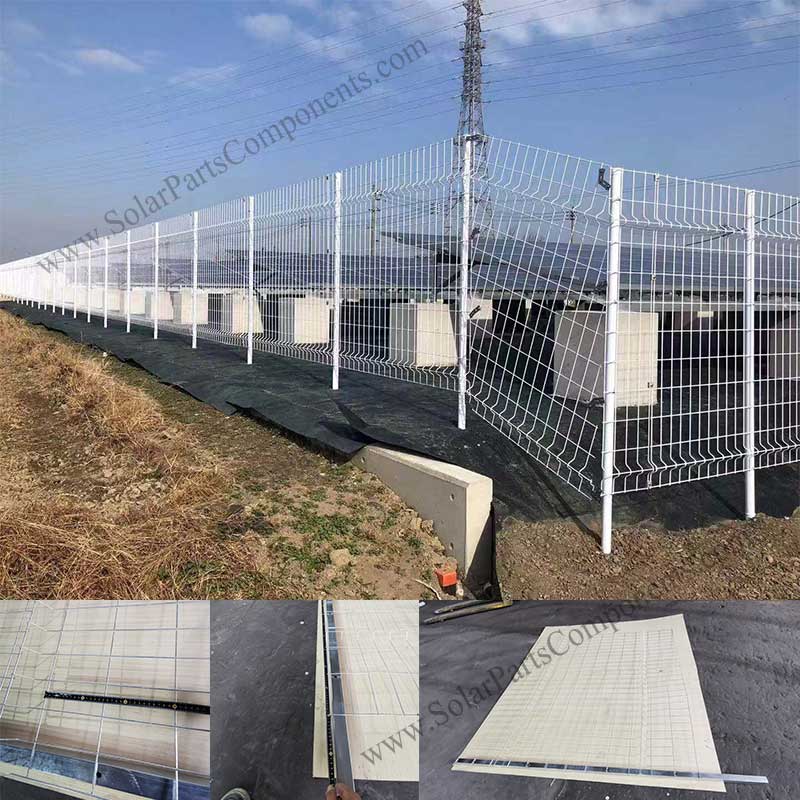
Galvanized fence for solar energy wholesale, the galvanized treatment can keep long life pretecting solar power farm safe.
The wire mesh can be 40*40 / 50*50… including fence post and gate from factory direct.
Content:
Product Description:
A metal fence is very important gear to protect solar system from aninals or livestock.
Keep whole solar power station a clean circumstance by using this galvanized steel fence kits.
Features of this fence for solar:
a) Anti-corrosive by galvanizing surface treatment;
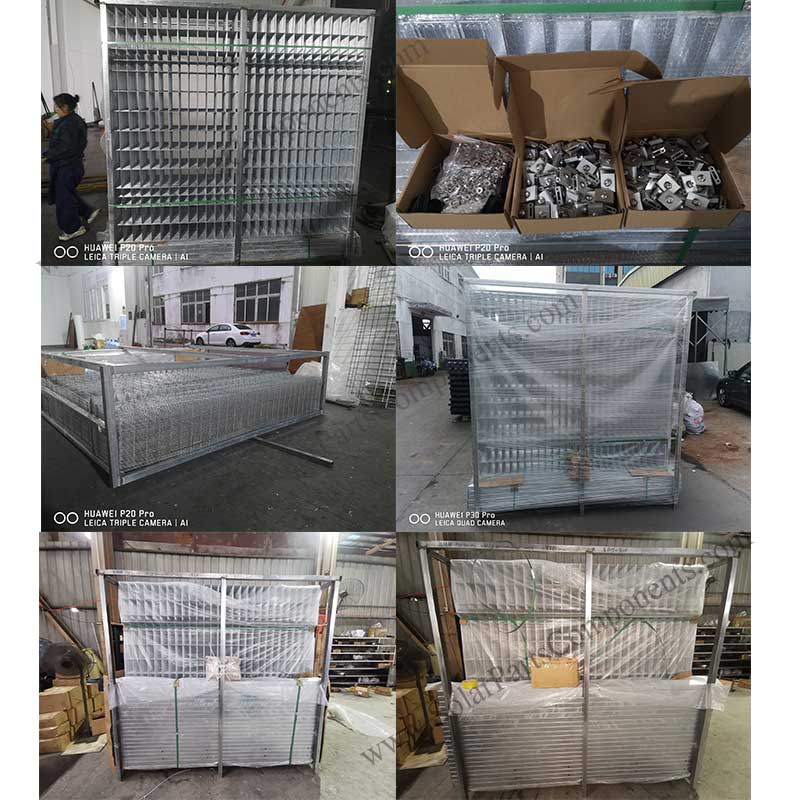
b) Pre-assembled, pallet-packed quick installation;
c) Cost effective by factory mass production;
d) Customized hole design is available, like hexagonal/rectangular / square / diamond…
e) Good appearance with smooth and bright galvanized treating surface.
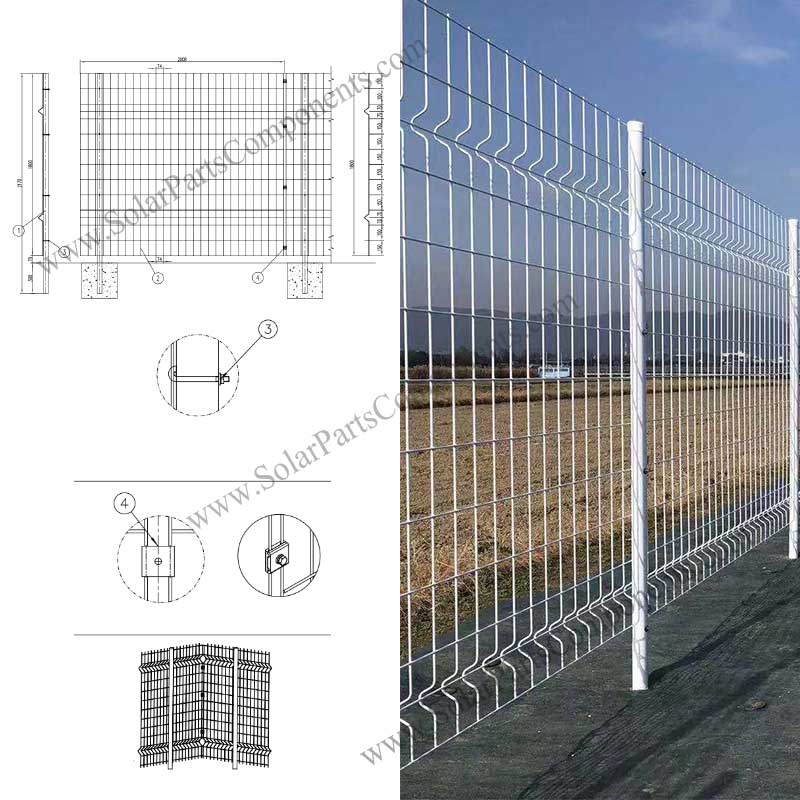
Parameter of galvanized fence:
(1) Application: solar ground station;
(2) Material: metal wire;
(3) Span: 180cm / 200cm / 220cm…
(4) Mesh size: ϕ4-80X80,ϕ4-100X100…
(5) Height: 60 -220cm;
(6) Color: galvanized coating;
(7) Life warranty: 10 years;
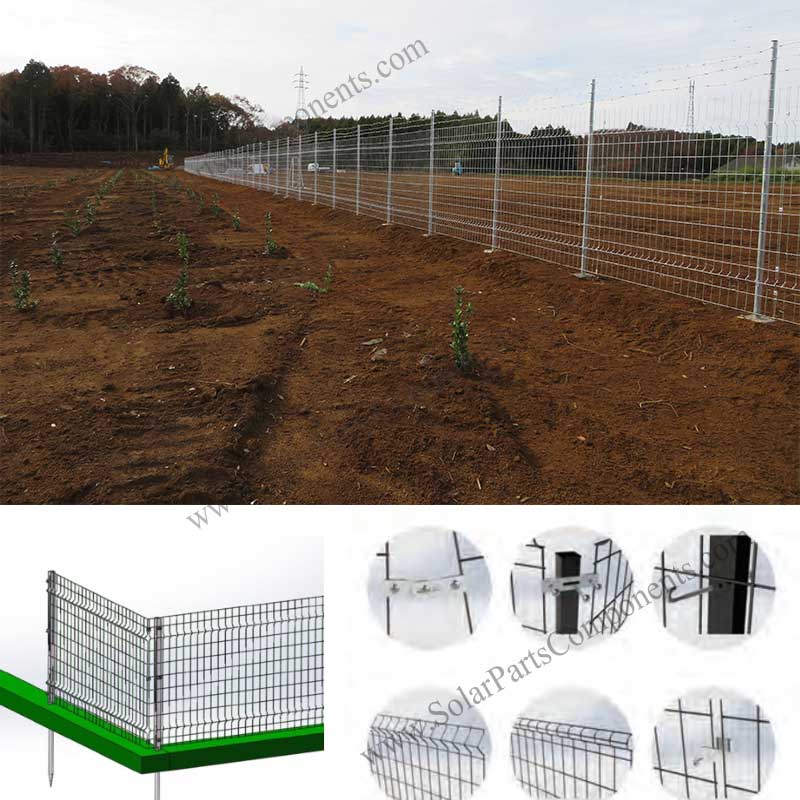
Parts and Components for galvanized steel fence for solar farm:
– column;
– mesh fixing hook;
– slope area connector;
– rectangle mesh connector;
-galvanized fence post;
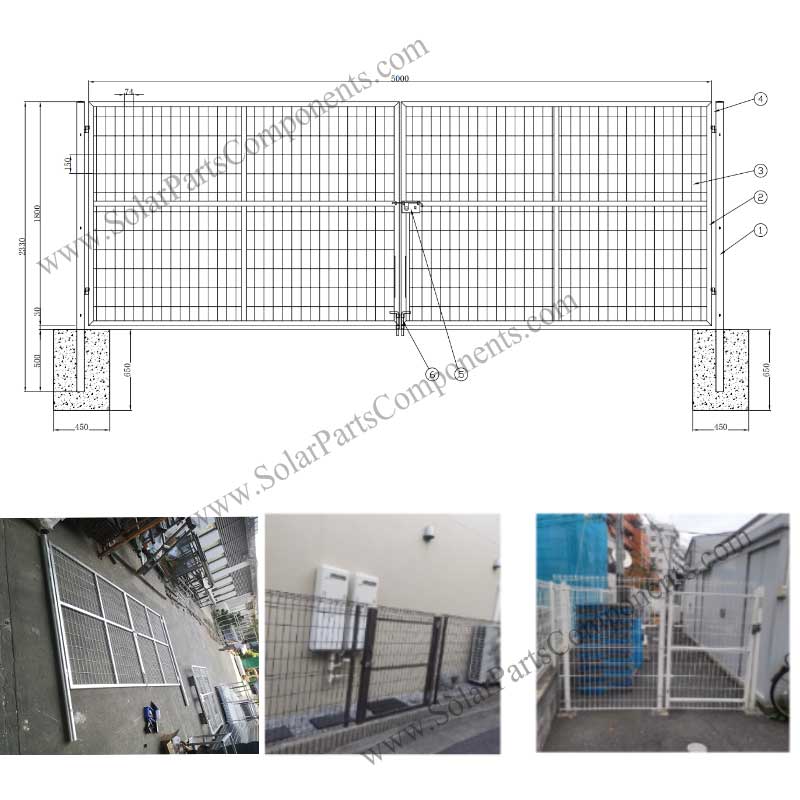
-galvanized fence gate;
-galvanized fence wire;
This steel metal fence is good option for rabbit, cattle, horse… guarding. If you need strong fence around solar pv modules, SPC solar fence is strong anti-corrosion, affordable, durable and easy to installing.
Wide options of fencing type / pattern / wire style available like powder coated / pvc coated… for choosing besides galvanized metal fence for your pv power farm from www.SolarPartsComponents.com.
| Brief Descriptions: | |
| Solar Mounting Components – galvanized fence for solar energy | |
| Item type: | Solar Panel Components |
| Type: | Solar Panel Fasten Hardware |
| Installation Site: | Ground solar Panel Mounting |
| Profile Material: | QB235 |
| Color: | Silvery/customer requirements |
| PV Modules: | Frameless or Glass |
| Module Orientation: | Landscape and Portrait |
| Standards: | AS/NZS 1170 |
| DIN 1055 | |
| GB50009-2012 | |
| IBC2009 | |
| TUV | |
| JIS C 8955 : 2011 | |
| International Building Code IBC 2009 | |
| California Building Code CBC 2010 | |
| Warranty | 10 years |
| Designed Lifespan | 25 years |
| Packing Details: | |
| Inner: | Bubble bag+inner box+Carton |
| Outer: | Wooden Box, Steel Pallet, MDF, etc |
Installation Manual for galvanized fence for solar energy
Galvanized fence for solar energy wholesale factory.
Please Click to download the PDF:Installation-Manual-for-Solar -Fence
Installation Manual for solar fence
Installation Manual for Solar Fence
- Construction sequence
Surveying and setting off → digging foundation earthwork → laying foundation → pouring column → installing fence
1.1 Drawing Size for the Fence:
1.2 Installation Tools
| Allen wrench M6 | Spana | Torque wrench |
|
|
|
|
| Taper | Ruler Water Level (1~2m) | Hex Wrench (M6~M12) |
|
|
|
Electric driver Electric dalay drill (5mm)
1.3 Fence specification parts list (due to different designs, some parts may not be included)
|
|
************************
| No. | Parts Name | Size |
|
1 |
Column |
48*48 |
| 2 | Fence | 2000X800~1800 |
|
3 |
:
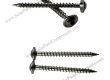
L shape screw hook |
L |
| 4 | Connector Clamp | 35*27 |
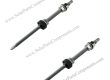
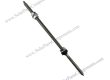
| 5 | Pile under pillar | Φ 38X2 |
| 6 | 内六角ポルト | M6*16 |
1.4 Picture of the parts
************************
|
|
|
|
|
|
|
Column |
Fence |
L shape screw |
Pile under pillar |
Connector Clamp |
- Description
************************ 1)Clonmn
Support the fence, and the mesh fence is fixed to the column with the connecting for the fence.
2)Fence
Fence is placed according to the terrain, so that the ground is flat when necessary to make a clean fence
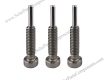
3)L Screw
It is used to connects the column and fence to secure the entire structure.
- Pile under pliar
After the position of pile is settled, the operation and construction are carried out according to the requirements
- Connect clamp
It is used to connect the fence.
- Installation
2.1 Putting a stake in the right position
************************
Installation of piles according to the design drawings:X
As shown in the figure above, X is the distance between the two piles, drive the pile into the ground, and the exposure of the whole pile is 100mm.
Notice: Please keep the inclination of the post within 3 degrees.
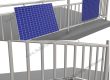
- Installation of the Column
************************
Attach the standing column to the pile in the following way.
The position of the hole is adjusted to be perpendicular to the horizontal line. Please refer to the photos below for the specific method.
|
3 Installation of the fence
3.1 * Set the fence to the ground level XXMM, and lock the fence to the column with three L-shaped screws.
************************
3.2 *The fenc is connected to the mesh wire with the connector clamps and fixed as follows.
************************
3.3 *Lock the fence to the column with L-shaped connecting metal fittings, as shown in the picture below!
************************
3.4 *The wires of the two fences are connected, and they are connected by a three-piece connector clamps.
************************
4Connect the fence
4.1 Single juction
************************
In the same way, connect and fix with corner fittings, as shown in the picture below.
- Adjust the
************************
Use the wire cutters to take care of the unnecessary parts.
- After the fence installed
************************
Please kindly check more details about the installation manual for solar fence>>
Installation Manual for solar fence
- Overview
-
Product Description:
Galvanized fence for solar energy wholesale, the galvanized treatment can keep long life pretecting solar power farm safe.
The wire mesh can be 40*40 / 50*50… including fence post and gate from factory direct.Content:
Product Description:
A metal fence is very important gear to protect solar system from aninals or livestock.
Keep whole solar power station a clean circumstance by using this galvanized steel fence kits.
Features of this fence for solar:
a) Anti-corrosive by galvanizing surface treatment;
b) Pre-assembled, pallet-packed quick installation;
c) Cost effective by factory mass production;
d) Customized hole design is available, like hexagonal/rectangular / square / diamond…
e) Good appearance with smooth and bright galvanized treating surface.
Parameter of galvanized fence:
(1) Application: solar ground station;
(2) Material: metal wire;
(3) Span: 180cm / 200cm / 220cm…
(4) Mesh size: ϕ4-80X80,ϕ4-100X100…
(5) Height: 60 -220cm;
(6) Color: galvanized coating;
(7) Life warranty: 10 years;
Parts and Components for galvanized steel fence for solar farm:
– column;
– mesh fixing hook;
– slope area connector;
– rectangle mesh connector;
-galvanized fence post;
-galvanized fence gate;
-galvanized fence wire;This steel metal fence is good option for rabbit, cattle, horse… guarding. If you need strong fence around solar pv modules, SPC solar fence is strong anti-corrosion, affordable, durable and easy to installing.
Wide options of fencing type / pattern / wire style available like powder coated / pvc coated… for choosing besides galvanized metal fence for your pv power farm from www.SolarPartsComponents.com.
- Specification
-
Brief Descriptions: Solar Mounting Components – galvanized fence for solar energy Item type: Solar Panel Components Type: Solar Panel Fasten Hardware Installation Site: Ground solar Panel Mounting Profile Material: QB235 Color: Silvery/customer requirements PV Modules: Frameless or Glass Module Orientation: Landscape and Portrait Standards: AS/NZS 1170 DIN 1055 GB50009-2012 IBC2009 TUV JIS C 8955 : 2011 International Building Code IBC 2009 California Building Code CBC 2010 Warranty 10 years Designed Lifespan 25 years Packing Details: Inner: Bubble bag+inner box+Carton Outer: Wooden Box, Steel Pallet, MDF, etc - Download
-
Installation Manual for galvanized fence for solar energy
Galvanized fence for solar energy wholesale factory.
Please Click to download the PDF:Installation-Manual-for-Solar -Fence
- FAQ
-
Installation Manual for solar fence
Installation Manual for Solar Fence
- Construction sequence
Surveying and setting off → digging foundation earthwork → laying foundation → pouring column → installing fence
1.1 Drawing Size for the Fence:
1.2 Installation Tools
Allen wrench M6 Spana Torque wrench Taper Ruler Water Level (1~2m) Hex Wrench (M6~M12) Electric driver Electric dalay drill (5mm)
1.3 Fence specification parts list (due to different designs, some parts may not be included)
************************
No. Parts Name Size 1
Column
48*48 2 Fence 2000X800~1800 3
: L shape screw hook
L 4 Connector Clamp 35*27 5 Pile under pillar Φ 38X2 6 内六角ポルト M6*16 1.4 Picture of the parts
************************
Column
Fence
L shape screw Pile under pillar
Connector Clamp - Description
************************ 1)Clonmn
Support the fence, and the mesh fence is fixed to the column with the connecting for the fence.
2)Fence
Fence is placed according to the terrain, so that the ground is flat when necessary to make a clean fence
3)L Screw
It is used to connects the column and fence to secure the entire structure.
- Pile under pliar
After the position of pile is settled, the operation and construction are carried out according to the requirements
- Connect clamp
It is used to connect the fence.
- Installation
2.1 Putting a stake in the right position
************************
Installation of piles according to the design drawings:X
As shown in the figure above, X is the distance between the two piles, drive the pile into the ground, and the exposure of the whole pile is 100mm.
Notice: Please keep the inclination of the post within 3 degrees.
- Installation of the Column
************************
Attach the standing column to the pile in the following way.
The position of the hole is adjusted to be perpendicular to the horizontal line. Please refer to the photos below for the specific method.
M6x16 locks in Porto
3 Installation of the fence
3.1 * Set the fence to the ground level XXMM, and lock the fence to the column with three L-shaped screws.
************************
3.2 *The fenc is connected to the mesh wire with the connector clamps and fixed as follows.
************************
3.3 *Lock the fence to the column with L-shaped connecting metal fittings, as shown in the picture below!
************************
3.4 *The wires of the two fences are connected, and they are connected by a three-piece connector clamps.
************************
4Connect the fence
4.1 Single juction
************************
In the same way, connect and fix with corner fittings, as shown in the picture below.
- Adjust the
************************
Use the wire cutters to take care of the unnecessary parts.
- After the fence installed
************************
Please kindly check more details about the installation manual for solar fence>>
Installation Manual for solar fence
- Leave Message
-